


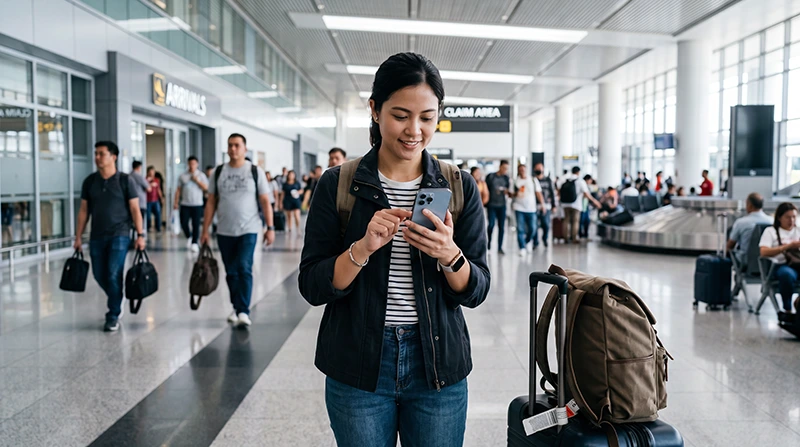

An eSIM can provide mobile data after landing at Manila Airport when the phone is compatible, unlocked and prepared before the flight. Installing in advance avoids trying to scan a QR code while managing luggage, immigration and onward transport.
Installation does not always start plan validity. The activation rule depends on the purchased plan, so follow its instructions about when to switch the eSIM on. After arrival, select the travel line for mobile data, enable roaming on that eSIM when required and test with Wi-Fi turned off.
NoveSIM travel eSIMs are data-only. We do not provide a Philippine phone number, conventional calls or carrier SMS. WhatsApp and other internet-based services can use the eSIM data connection while remaining registered to the existing number.
Quick answer: install the Philippines eSIM on dependable Wi-Fi before departure, but activate it according to the plan’s validity rules. At Manila Airport, switch on the travel line, select it for mobile data, enable Data Roaming on that eSIM and disable automatic switching to the primary SIM. Keep the QR code private and do not delete the eSIM if the first connection attempt fails.
Top Philippines eSIMs


Confirm the phone is ready before the airport journey
Complete the compatibility checks before purchasing. The exact model and regional variant must support eSIM, and a phone originally supplied by a mobile operator must be unlocked for another provider.
Before leaving home:
- record the exact phone model and confirm eSIM support;
- verify the carrier-unlocked status;
- install pending system updates;
- connect to stable Wi-Fi;
- open the QR code on a second screen or keep the manual details available;
- save the order instructions offline.
If compatibility is uncertain, use the Philippines eSIM compatibility checklist before buying or scanning a code.
Install the eSIM before flying to Manila
Install while you still have reliable internet and time to read each prompt. Do not assume that scanning the QR code and beginning the validity period are the same event.
- Open the eSIM order instructions on another device.
- On the travel phone, open the option to add an eSIM or mobile plan.
- Scan the supplied QR code.
- Use manual installation details only when they were provided for that purpose.
- Follow the prompts until the new plan appears in the SIM settings.
- Label it clearly, for example Philippines Data.
- Keep the eSIM installed and store the instructions securely.
Do not switch the plan on early when the instructions say validity begins on activation. The full device-neutral procedure is in the Philippines eSIM installation guide.
Save the NAIA arrival details offline
Ninoy Aquino International Airport has several terminals, and an arriving passenger may need a specific pickup zone or onward-transfer instruction. Mobile data is helpful, but it should not be the only place where those details exist.
Save:
- the terminal shown on the booking;
- the accommodation address and map pin;
- the pickup point or meeting instructions;
- the hotel or host telephone number;
- the onward flight or bus details;
- a screenshot of the eSIM activation steps.
This preparation remains useful if airport Wi-Fi is unavailable, requires an unexpected login or performs poorly in a crowded area.
Activate the eSIM after landing at Manila Airport
Wait until the plan’s stated activation conditions are met. Then configure the two SIMs deliberately:
- Open the phone’s SIM or cellular settings.
- Switch on the Philippines eSIM.
- Select it as the preferred mobile-data line.
- Enable Data Roaming on the travel eSIM when required.
- Turn off automatic cellular-data switching.
- Keep data roaming off on the primary SIM unless the home operator has confirmed the cost.
- Leave network selection on Automatic.
- Turn off Wi-Fi and load a simple webpage.
Testing without Wi-Fi confirms that the phone is actually using cellular data. A messaging notification alone is not proof because it may have arrived over an airport hotspot.
For more detail on validity and settings, use the Philippines eSIM activation guide.
Use airport Wi-Fi only as a setup backup
Airport Wi-Fi can be useful when the eSIM was not installed in advance or the traveller needs to retrieve instructions. Availability, login requirements and performance can change, so do not make it the only arrival plan.
When using a wireless network:
- confirm the official network name;
- avoid unexpected certificate warnings;
- do not expose the QR code to people nearby;
- avoid sensitive account access on an unverified hotspot;
- download only the information needed to complete setup.
The separate Manila Airport Wi-Fi guide covers connection and access questions without mixing them into the eSIM activation process.
Prepare for a transfer between Manila Airport terminals
A terminal transfer is a time-sensitive journey. Confirm the departure terminal and the transfer arrangement before leaving the arrivals area. Do not assume that walking between terminals is appropriate or that one pickup point serves every terminal.
When the eSIM is working, use it to check updated airline instructions and communicate with the transport provider. Still retain the booking and terminal details as screenshots. Traffic and security procedures can affect journey time, so battery charge may matter as much as the data allowance.
If Manila is only a connection, avoid unnecessary settings changes during a short transfer. A temporarily weak indoor signal may improve near an entrance or after moving to another terminal area.
Compare an eSIM with a physical SIM after landing
| Consideration | Travel eSIM | Physical local SIM |
|---|---|---|
| Preparation | Can be installed before travel | Purchased and registered after arrival |
| Local number | NoveSIM plans are data-only | May include a Philippine number |
| Primary SIM | Can remain in a dual-SIM phone | May require a slot or physical swap |
| Airport time | No kiosk purchase when prepared | Depends on retailer availability and queue |
| Compatibility | Requires an unlocked eSIM-capable phone | Requires an unlocked phone and compatible SIM slot |
A local SIM may be more appropriate when a Philippine number is essential. Travellers considering that option can use the Manila Airport SIM-card guide. The comparison is about requirements, not a universal winner.
Keep the primary number without accidental data roaming
A dual-SIM phone can keep the usual line available while the travel eSIM provides internet. This does not make calls, SMS or voicemail activity on the primary line free. The home operator’s roaming tariff still applies.
Select the Philippines eSIM for mobile data and disable automatic data switching. Keep roaming data off on the primary SIM unless the operator has confirmed the charge. Check the selected line before placing a conventional call or sending an SMS.
WhatsApp does not need a new registration merely because another line supplies data. The existing account can continue over the eSIM connection.
Fix a first connection that does not work
Do not delete the profile or reset every network setting. Work through the checks in order:
- Confirm that the plan should be active and has valid data.
- Make sure the Philippines eSIM is switched on.
- Select it as the mobile-data line.
- Enable Data Roaming on that eSIM.
- Turn off Wi-Fi and test again.
- Toggle Airplane Mode once.
- Restart the phone once if necessary.
- Return network selection to Automatic.
If manual APN entry is required, use data.esim and leave automatically supplied MCC and MNC values unchanged. Do not copy the APN of a Philippine domestic operator. Continue with the Philippines eSIM troubleshooting guide if data still fails.
Continue from NAIA into Metro Manila
Once cellular data works, save the route and accommodation pin before requesting transport. Verify the terminal pickup zone and the exact destination because hotels and buildings may have similar names or several entrances.
Mobile data helps with live journey estimates and driver messages, but traffic can lengthen the trip considerably. Keep the phone charged and preserve screenshots of the address and check-in details. The Manila tourist internet guide covers city use after leaving the airport.
Related Articles
- Internet Options at Manila Airport
- Wi-Fi at Manila Airport
- SIM Cards at Manila Airport
- Activate a Philippines eSIM
- Internet in Manila for Tourists
FAQ
Should I install my Philippines eSIM before landing in Manila?
Yes, installation on dependable Wi-Fi before departure is usually easier. Follow the purchased plan’s instructions about when to switch it on, because installation and the start of validity may be different events.
Do I need Manila Airport Wi-Fi to activate an installed eSIM?
Not necessarily. When the profile is already installed, it may connect through mobile data after the travel line, roaming and data selection are configured. Wi-Fi remains useful for retrieving instructions or completing an unfinished installation.
Will a NoveSIM eSIM give me a Philippine phone number?
No. NoveSIM travel eSIMs are data-only and do not provide a local number, conventional calls or carrier SMS. Internet calling and messaging apps can use the data connection.
Should I delete the eSIM if it does not connect at NAIA?
No. Check activation status, the selected data line, Data Roaming, automatic network selection and APN first. Keep the profile installed and remove it only if NoveSIM support specifically instructs you to do so.
Final Recommendation
Prepare the eSIM before the flight: confirm compatibility and unlocked status, install on dependable Wi-Fi and save the activation instructions and Manila arrival details offline.
At the airport, follow the plan’s activation rule, select the travel eSIM for mobile data, enable roaming on that line and disable automatic switching to the primary SIM. Test with Wi-Fi off before arranging transport.
Use airport Wi-Fi as backup, not as a guaranteed setup method. Keep the eSIM installed during troubleshooting and preserve the terminal, pickup and destination information for the journey into Metro Manila.