


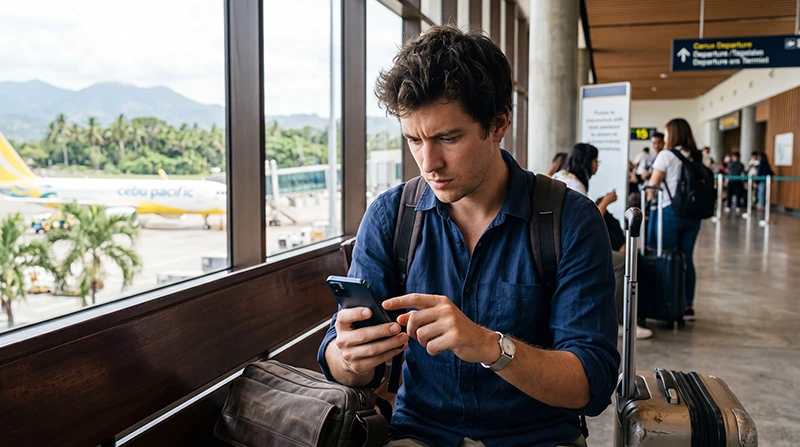

An eSIM that does not work in the Philippines usually needs a settings or network-registration check rather than immediate replacement. The fastest approach is to identify the exact symptom and test one change at a time.
Do not delete the installed eSIM as a first troubleshooting step. Many eSIM profiles cannot simply be scanned again, and deletion can turn a settings problem into an installation problem. Keep the installation email and order details available while you work through the checks.
Quick answer: Confirm that the eSIM is installed and enabled, select it for mobile data, enable data roaming for the travel line when required and leave network selection on automatic. Turn airplane mode on briefly, turn it off and wait several minutes. If data still does not work, restart the phone, check the APN against the plan instructions and contact NoveSIM support before deleting the eSIM.
Top Philippines eSIMs


Identify the symptom before changing settings
“Not working” can describe several different problems. The correct next step depends on what the phone shows.
| What you see | Start with |
|---|---|
| The eSIM is missing from mobile settings | Confirm whether installation completed and whether the profile appears under SIMs or mobile plans |
| The eSIM is present but turned off | Enable the line and select it for mobile data |
| No Service or no network name | Check arrival location, airplane mode and automatic network selection |
| Signal bars appear but websites do not load | Check the data line, roaming and APN; use the focused no-data guide |
| Internet works but is unusually slow | Check signal strength, congestion, route and fair-use conditions |
| The plan shows as expired or out of data | Review validity, allowance and activation timing in the order details |
If the phone has signal but no internet, follow the dedicated Philippines eSIM no-data checklist. If the connection works but performs poorly, use the slow Philippines eSIM guide.
1. Confirm that installation completed
Open the phone’s mobile-network settings and look for the travel eSIM. It may appear under the label you selected during installation rather than under the word “Philippines.” Common labels include Travel, Secondary, Business or a custom name.
If the profile appears, do not scan the QR code again. Continue with the settings checks below. If it does not appear, review the installation email and confirm whether the phone displayed a completion message. A QR-code error, an interrupted download or an incompatible device requires a different solution from a network problem.
Before reinstalling anything, confirm the exact phone model is eSIM-compatible and network-unlocked. The Philippines eSIM compatibility guide explains these checks.
2. Enable the eSIM line
An installed profile can remain switched off. In the SIM or mobile-plan settings, open the travel eSIM and make sure the line is enabled.
Use a clear label such as Philippines Data. This reduces the chance of changing the home SIM by mistake, especially when the settings screen uses terms such as Primary, Secondary, Personal or Business.
3. Select the eSIM for mobile data
Enabling the line does not automatically make it the data source. Open the phone’s mobile-data setting and select the Philippines eSIM.
If the home SIM remains selected, the travel plan may look inactive even though it is correctly installed. To avoid accidental home-network roaming, turn off automatic mobile-data switching or cellular-data switching while troubleshooting.
4. Enable data roaming on the travel eSIM
Travel eSIMs commonly connect through a partner network, so data roaming often needs to be enabled on the eSIM profile. This setting should apply to the travel line, not the home SIM.
- Open the settings for the Philippines eSIM.
- Enable data roaming when the plan instructions require it.
- Keep data roaming disabled on the home SIM unless your home operator confirms that roaming is included.
Turning on roaming for a travel eSIM does not by itself route the home line’s data through roaming. The important safeguards are selecting the eSIM for mobile data and disabling data switching.
5. Refresh the network connection
After landing or changing islands, the phone may need time to register with an available partner network. Complete the following sequence after the aircraft has arrived and mobile service is permitted:
- Turn airplane mode on.
- Wait about 20 seconds.
- Turn airplane mode off.
- Keep automatic network selection enabled.
- Wait several minutes before testing again.
Test with a simple webpage rather than a large download. If the phone is inside a terminal, concrete building or transport vehicle, move near a window or outdoors before concluding that the plan has no coverage.
6. Restart the phone
A restart forces the device to reload its SIM and network settings. Restart after confirming the correct data line and roaming setting so that the phone reconnects with the intended configuration.
After restarting, wait for the network name or signal indicator to appear. Avoid changing several settings during this wait because that makes it harder to identify what solved the problem.
7. Check automatic network selection
Automatic selection is the correct starting point. It allows the eSIM to register with an available supported partner rather than remaining attached to a manually chosen network that may not work in the current area.
If NoveSIM support or the plan instructions provide a specific manual-network sequence, follow that guidance exactly. Otherwise, do not test random operators repeatedly. Manual selection can delay registration or leave the phone on an unsupported network.
Remember that coverage varies across the Philippines. Signal can change between Manila, Cebu, a ferry route and a smaller island. The Philippines network guide explains why route-level coverage matters.
8. Check the APN only when necessary
Many phones configure the access point automatically. Do not replace an existing APN with a guessed value. First compare the current entry with the instructions supplied for the purchased plan.
If an APN is required, enter it exactly as provided, without extra spaces. Save the change, return to mobile settings and refresh the connection. The step-by-step device paths are covered in the Philippines eSIM APN guide.
9. Check validity and remaining data
A correctly configured eSIM cannot provide data after its validity ends or its allowance is exhausted. Review the order details and confirm:
- when the validity period started;
- how many days the plan covers;
- whether the data allowance has been used;
- whether a fair-use threshold affects the current speed;
- whether the Philippines is explicitly included.
If the plan activated earlier than expected, record the dates and include them when contacting support.
10. Separate coverage problems from setup problems
If the eSIM works in one location but fails during a ferry crossing, rural transfer or remote-island visit, the profile is probably installed correctly. The issue may be local signal availability rather than configuration.
Move to an open area and wait for the phone to re-register. Keep offline maps, hotel addresses and transport confirmations available for weak-signal parts of the trip. An eSIM cannot guarantee service in every bay, mountain area or stretch of open water.
When to contact NoveSIM support
Contact support after completing the safe checks above if the eSIM remains unavailable. Provide concise diagnostic information so the problem can be identified without repeating every step.
- Order number or purchase email
- Exact phone model
- Current city or island
- What the phone displays: no profile, no service, signal without data or slow data
- Whether the eSIM is enabled and selected for mobile data
- Whether data roaming is enabled on the eSIM
- A screenshot of the relevant settings with personal details hidden
Do not publish or send the full QR code in a public message. Do not delete the eSIM unless support specifically confirms that deletion is the correct next step.
Related Articles
- Philippines eSIM Plans
- How to Activate a Philippines eSIM
- Philippines eSIM Has Signal but No Internet
- APN Settings for a Philippines eSIM
- Why Is My Philippines eSIM Slow?
- Philippines eSIM Phone Compatibility
- Best Network in the Philippines for Tourists
FAQ
Why is my eSIM not working after arriving in the Philippines?
The eSIM may be disabled, not selected for mobile data or waiting to register with a partner network. Enable the line, select it for data, enable roaming when required and refresh the connection with airplane mode.
Should I delete and reinstall a Philippines eSIM?
No, not as an initial troubleshooting step. Some profiles cannot be installed again with the same QR code. Contact NoveSIM support before deleting an installed eSIM.
Why does my Philippines eSIM show signal but have no internet?
The wrong data line, disabled roaming or an APN issue can cause this symptom. Follow the focused no-data checklist and change one setting at a time.
Can weak coverage make a working eSIM appear broken?
Yes. Reception can change on ferries, rural roads and smaller islands. If the eSIM worked elsewhere, move to an open populated area and allow the phone time to reconnect before changing its configuration.
Final Recommendation
Troubleshoot a Philippines eSIM in a controlled order: confirm installation, enable the line, select it for data, check roaming, refresh the network and restart the phone. Use automatic network selection first and check the APN only against the plan instructions.
Separate a device-settings problem from a local coverage gap by noting whether the eSIM worked earlier and what the phone currently displays. Most importantly, do not delete the profile during trial-and-error troubleshooting. If the safe checks fail, send NoveSIM support the exact device, location and symptom details.