


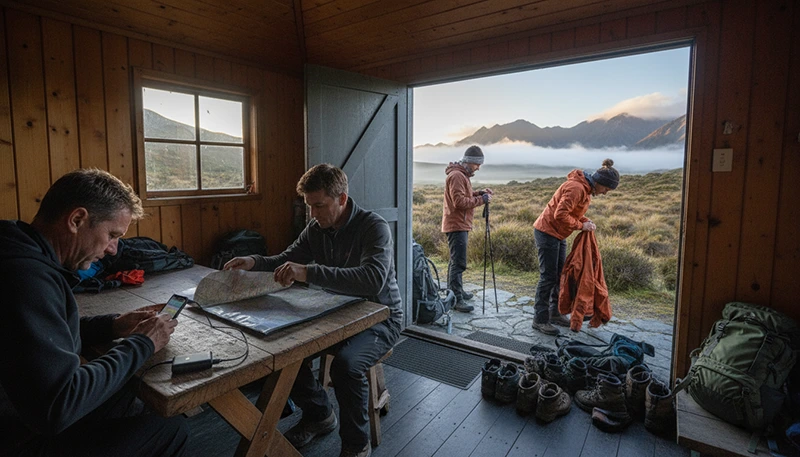

Mobile data can make hiking in New Zealand easier by helping with transport, route planning, accommodation messages, weather checks and navigation before and after a walk. However, many trails pass through forests, valleys, mountain terrain and sparsely populated regions where mobile reception may become weak or disappear completely.
The most reliable approach is to use mobile data as a planning and communication tool while preparing your phone to work offline. A correctly installed New Zealand travel eSIM can provide convenient access where supported coverage is available, but it should never be treated as a guaranteed trail-navigation or emergency service.
Quick answer: choose a data allowance for your full New Zealand itinerary, download all maps and route information before leaving a connected area, keep the travel eSIM selected for Mobile Data and preserve battery during long no-signal sections. For remote or multi-day hikes, use appropriate safety equipment and do not depend on a phone connection alone.
Top New Zealand eSIMs

New Zealand eSIM
Fixed
1 GB, 7 days€ 2.182 GB, 15 days€ 3.933 GB, 30 days€ 5.24Unlimited
Unlimited, 1 day€ 2.62Unlimited, 3 days€ 6.54Unlimited, 5 days€ 10.47
Asia eSIM
Fixed
1 GB, 7 days€ 4.362 GB, 15 days€ 7.853 GB, 30 days€ 10.47Unlimited
Unlimited, 1 day€ 5.67Unlimited, 3 days€ 15.27Unlimited, 5 days€ 24.87How Mobile Data Helps New Zealand Hikers
Most mobile data use happens before reaching the remote part of a trail. It can also be useful after returning to a road, settlement or accommodation.
Mobile data can help you:
- Navigate to a trailhead or transport pickup point.
- Open shuttle and bus confirmations.
- Check accommodation access instructions.
- Review current route information before departure.
- Download maps and supporting documents.
- Contact tour operators or hosts.
- Receive delayed messages after returning to coverage.
- Arrange onward transport or accommodation.
- Share your return safely after completing the route.
The connection becomes less dependable once you move away from populated places and enter terrain that blocks or weakens mobile signals.
How Much Mobile Data Do You Need for Hiking?
Hiking does not usually require a very large allowance when maps, tickets and route documents are downloaded in advance. Your total usage depends more on the length of the complete holiday, your upload habits and whether you use your phone as a hotspot.
| Travel Style | Suggested Starting Allowance | Typical Use |
|---|---|---|
| Short hiking weekend | 1 GB to 3 GB | Maps, messages and transport |
| One-week hiking holiday | 5 GB to 10 GB | Daily navigation, bookings and light sharing |
| Two-week road trip with several hikes | 10 GB to 20 GB | Navigation, accommodation and frequent travel planning |
| Frequent photo and video uploads | 10 GB or more | Social media and cloud sharing |
| Hotspot and remote-work use | A substantially larger allowance | Laptop use and video meetings |
These figures are planning estimates rather than fixed requirements. Video uploads, automatic cloud backup and application updates can consume far more data than maps or messaging.
Read the full guide to choosing a New Zealand data allowance.
Which Activities Use the Most Data?
Understanding where your allowance goes can help you preserve mobile data for transport and navigation.
| Activity | Relative Data Use | Recommended Approach |
|---|---|---|
| Text messaging | Low | Suitable for mobile data |
| Map searches and directions | Low to moderate | Download offline areas first |
| Weather and booking pages | Low | Save important information locally |
| Photo uploads | Moderate | Upload through WiFi when possible |
| Video uploads | High | Wait for reliable WiFi |
| Video streaming | High | Avoid during hiking days |
| Cloud photo backup | Potentially very high | Pause while using mobile data |
| Laptop hotspot use | Variable to high | Restrict updates and background services |
A few short messages and navigation checks may use very little data, while one large video upload can consume a significant portion of a smaller plan.
Mobile Coverage on New Zealand Hiking Trails
Coverage varies according to terrain, distance from populated areas, device compatibility and the available local network. A popular track is not necessarily a continuously connected track.
| Environment | What to Expect |
|---|---|
| Town or urban trail | Mobile data is more likely to remain available |
| Trailhead near a main road | Coverage may be available before departure |
| Open farmland or exposed hillside | Reception may appear and disappear |
| Dense native forest | Signal may weaken significantly |
| Mountain valley | Extended no-service sections are possible |
| Remote national park | Prepare to operate without mobile data |
| Coastal or island trail | Coverage can vary with terrain and distance from settlements |
Your phone may show strong service near the start of a walk and lose it several kilometres later. This change does not necessarily indicate a problem with the eSIM.
Download Offline Maps Before Leaving
Offline maps reduce both data consumption and dependence on live reception. Download the complete route while connected to reliable WiFi or mobile data.
Save:
- The full walking route.
- The trailhead and parking area.
- Shuttle or bus pickup points.
- Alternative and return routes.
- Nearby roads and settlements.
- Your accommodation location.
- Important junctions and landmarks.
Open the map after downloading it and test it while the phone is temporarily offline. This confirms that the required area is genuinely stored on the device.
Save More Than Just the Map
A map is only one part of offline preparation. Store essential trip information somewhere that does not require internet access.
- Route distance and estimated duration.
- Difficulty and terrain notes.
- Transport confirmations.
- Meeting points and pickup times.
- Accommodation check-in details.
- Official notices available before departure.
- Hut, campsite or booking information.
- Emergency and visitor information.
- Contact details for relevant operators.
Screenshots can be useful for information that is otherwise stored inside an application or webpage requiring a connection.
Mobile Data for Day Hikes
For a day hike, mobile data is most useful before departure and after returning. You may use it to check the latest route details, confirm transport and send your expected return time to someone.
Before starting:
- Download the route and approach road.
- Save transport details.
- Store the accommodation address.
- Check that your phone is sufficiently charged.
- Turn off unnecessary background data.
- Carry a power bank.
- Tell someone where you are going and when you expect to return.
Once you enter a weak-signal area, repeated refreshing can waste battery without producing a usable connection.
Mobile Data for Multi-Day Hikes
Multi-day routes require more extensive offline preparation. You may remain without service for long periods and may only reconnect at selected road crossings, settlements or elevated positions.
Before departure:
- Download every section of the route.
- Save all hut or campsite details.
- Confirm bookings while still connected.
- Store transport information locally.
- Carry charging equipment suitable for the full trip.
- Share your full itinerary and expected return time.
- Use appropriate safety and communication equipment for the route.
Buying a larger data package does not improve reception where no supported mobile signal is available.
Using Mobile Data for Weather Information
Mobile data is useful for checking weather before you leave, but the forecast may not remain accessible after entering a no-service area.
Before starting the route:
- Review the latest available information.
- Save relevant notices or alerts.
- Check the expected conditions for the entire walking period.
- Allow extra time for changing conditions.
- Be prepared to modify or cancel the route.
Follow official guidance and local instructions. A live phone connection should not be considered a substitute for suitable outdoor preparation.
How to Reduce Mobile Data Use
- Download maps through WiFi.
- Save tickets and confirmations locally.
- Pause automatic photo and video backup.
- Disable application updates over mobile data.
- Turn off automatic video playback.
- Restrict background data for unnecessary applications.
- Upload photos after returning to WiFi.
- Avoid streaming during travel and hiking days.
- Monitor usage in the phone settings.
- Disconnect hotspot devices immediately after use.
These changes preserve your allowance for practical travel tasks such as navigation, messages and accommodation management.
How to Preserve Battery in No-Signal Areas
A phone can use additional power while repeatedly searching for a mobile network. GPS navigation, screen brightness, photography and cold conditions can also reduce battery life.
- Enable battery-saving mode.
- Reduce screen brightness.
- Close unused applications.
- Turn off automatic synchronisation.
- Pause cloud backup.
- Disable unnecessary Bluetooth connections.
- Use Airplane Mode during extended no-signal sections when appropriate.
- Keep the phone protected from moisture and cold.
- Carry a fully charged power bank.
Remember to turn Airplane Mode off when you want the device to reconnect to a mobile network.
Should You Use 5G While Hiking?
5G availability depends on your device, plan, local partner network, supported frequencies, congestion and exact location. Your phone may switch between 5G, 4G, a slower connection and no service during the same day.
You do not need 5G for ordinary hiking-related tasks. A stable 4G connection is generally sufficient for maps, messages, bookings and basic browsing.
In areas where 5G is weak or unstable, the phone may consume additional battery while moving between network types. Battery life and offline preparation are usually more important than maximum speed on hiking days.
Can You Use a Mobile Hotspot?
Hotspot support depends on the selected plan. When tethering is allowed, mobile data can be shared with a laptop, tablet or another traveller.
A hotspot can be useful:
- At accommodation with poor WiFi.
- Near a trailhead with mobile coverage.
- For downloading maps to a second device.
- For sending urgent work messages.
- For managing onward travel after a hike.
Hotspot use is rarely practical on the remote part of a trail. It also increases battery and data consumption, so connect other devices only when needed.
Travel eSIM or Local SIM for Hiking?
| Feature | Travel eSIM | Local Prepaid SIM |
|---|---|---|
| Purchase before departure | Usually possible | Usually arranged after arrival |
| Physical SIM replacement | Not required | Usually required |
| Keep primary SIM installed | Yes, on compatible phones | Depends on the device |
| New Zealand number | Not always included | Often available |
| Remote trail coverage guarantee | No | No |
| Arrival convenience | Can be prepared before travel | Requires local purchase and setup |
A local SIM does not automatically provide continuous service on remote tracks. Both options depend on the available mobile infrastructure and the terrain.
Compare travel eSIMs and local SIM cards in New Zealand.
Can You Keep Your Primary SIM Active?
A compatible Dual-SIM phone can use a travel eSIM for mobile data while keeping the primary SIM available for calls, SMS and verification messages.
To reduce accidental roaming charges:
- Select the travel eSIM for Mobile Data.
- Turn off Data Roaming on the primary SIM.
- Disable Automatic Data Switching.
- Check the selected line before making traditional calls.
Your home provider may still charge for calls, voicemail or certain messages while abroad.
How to Check eSIM Compatibility
Your phone must support eSIM and be carrier-unlocked. Compatibility may vary between regional versions of the same device.
Dial *#06#. An eSIM-compatible phone may display an EID alongside one or more IMEI numbers.
You may also find Add eSIM, Add Cellular Plan, Add Mobile Plan or SIM Manager in the device settings.
Recommended Mobile Data Settings
| Setting | Recommended Value |
|---|---|
| Travel eSIM | Enabled |
| Mobile Data | Travel eSIM |
| Data Roaming on travel eSIM | On |
| Data Roaming on primary SIM | Off |
| Automatic Data Switching | Off |
| Network Selection | Automatic |
| APN | data.esim when required |
| Automatic cloud backup | Off on mobile data |
| Application updates | WiFi only |
What to Do If Mobile Data Does Not Work
- Confirm that the plan includes New Zealand and remains valid.
- Check that the travel eSIM is enabled.
- Select it as the Mobile Data line.
- Enable Data Roaming on the travel eSIM.
- Disable Data Roaming on the primary SIM.
- Turn off Automatic Data Switching.
- Leave Network Selection on Automatic.
- Enter data.esim as the APN when manual configuration is required.
- Turn Airplane Mode on for 30 seconds and then turn it off.
- Wait several minutes for the device to register.
- Restart the phone if necessary.
If you are in a forest, valley, mountain area or remote national park, the problem may simply be a lack of local coverage. Test the connection again after returning to a road, town, trailhead or more open location.
Do not delete the eSIM while troubleshooting. The QR code may support only one installation.
Mobile Data Checklist for New Zealand Hiking
- Choose data for the complete trip, not one trail.
- Check that the phone supports eSIM.
- Install the eSIM before travel when permitted.
- Download full offline maps.
- Save route and transport information locally.
- Pause cloud backup and automatic updates.
- Use WiFi for large uploads.
- Carry a fully charged power bank.
- Expect weak or unavailable coverage in remote terrain.
- Share your route and expected return time.
- Use appropriate safety equipment for remote walks.
- Never delete the eSIM during troubleshooting.
Related New Zealand Travel Internet Guides
- New Zealand eSIM Plans
- Best eSIM for New Zealand
- Internet for Hiking in New Zealand
- Mobile Data on New Zealand Scenic Routes
- Internet for Fiordland National Park
- Internet for Milford Sound
- Internet for a South Island Road Trip
- Internet for a North Island Road Trip
- Best Mobile Data in New Zealand
- How Much Data Do You Need for New Zealand?
FAQ
How much mobile data do I need for hiking in New Zealand?
Approximately 5 GB to 10 GB may suit many one-week hiking holidays when maps are downloaded and WiFi is used for uploads. Longer road trips and hotspot use may require more.
Will mobile data work on every hiking trail?
No. Reception can weaken or disappear in forests, valleys, mountain terrain, national parks and sparsely populated areas.
Do offline maps use mobile data?
Downloading them uses data, but once properly stored they can usually be opened without a live connection. Download and test them before leaving.
Does a larger data package improve coverage?
No. A larger package provides more data but does not create mobile signal in an area without supported network coverage.
Should I turn on Airplane Mode while hiking?
It may preserve battery during long no-signal sections, but it also stops normal mobile communication until it is disabled again.
Can I use 5G on New Zealand trails?
5G may be available in some connected areas, but remote trails may have 4G, slower service or no reception. Offline planning remains essential.
What APN should I use for NoveSIM?
Use data.esim when manual APN configuration is required.
Final Recommendation
The best mobile data strategy for hiking in New Zealand is to use an eSIM for planning and communication while preparing for long periods without reception. Select an allowance based on your full itinerary, not only the hours spent walking.
Download maps, transport information, route notes and accommodation details before leaving a connected location. Pause automatic backups and updates, preserve battery and use WiFi for large uploads whenever possible.
Most importantly, remember that mobile data is a useful travel tool rather than a guaranteed safety system. Remote hiking requires suitable preparation, offline information and appropriate equipment even when your eSIM is installed correctly.