


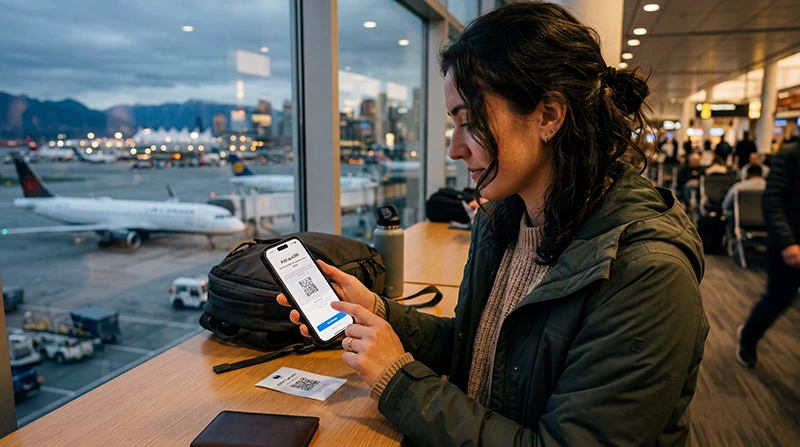

Using a Canada eSIM on iPhone requires three separate checks: the exact iPhone must support eSIM, it must be carrier-unlocked, and the purchased plan must be configured as the phone’s mobile-data line. Seeing an “Add eSIM” option confirms only part of that process.
Menu labels can vary by iOS version and region. On current devices, the relevant controls usually appear under Settings > Cellular or Settings > Mobile Service. Follow the instructions supplied with the purchased eSIM whenever they differ from a general guide.
NoveSIM travel eSIMs provide data only. We do not provide a Canadian phone number or conventional cellular calls and SMS with these plans. You can often keep the primary line enabled for its number while the Canada eSIM handles data, but charges on the primary line remain subject to your carrier.
Quick answer: Before buying a Canada eSIM for iPhone, confirm eSIM support and check that Carrier Lock shows “No SIM restrictions.” Install the plan on dependable Wi-Fi, label it clearly, select it under Cellular Data after arrival and turn off Allow Cellular Data Switching. Enable Data Roaming on the travel eSIM when the plan instructions require it, while keeping roaming off on the primary line unless you intend to use it.
Top Canada eSIMs


Check Whether This iPhone Can Use an eSIM
Do not rely only on the model family printed in a product listing. eSIM availability can vary by the device’s market of origin and configuration. The safest check is on the iPhone itself.
- Open Settings > General > About.
- Look for an EID. Its presence is a strong device-level sign that the iPhone includes eSIM capability.
- Return to Settings > Cellular or Mobile Service and look for “Add eSIM.”
- Check the exact model against the NoveSIM compatible-device list.
If the phone has no EID and no Add eSIM control, do not purchase a travel eSIM for that device until compatibility has been confirmed. A software update cannot add missing eSIM hardware.
Confirm That the iPhone Is Carrier-Unlocked
An eSIM-compatible iPhone can still reject another provider’s plan when it is locked to its original carrier. In Settings > General > About, find Carrier Lock. “No SIM restrictions” indicates that the phone is unlocked.
If a restriction is shown, contact the carrier that applied the lock. NoveSIM cannot remove a carrier lock, and buying another QR code does not solve it. Complete this check before departure so there is time to resolve the issue.
Prepare the iPhone before Installation
Use dependable private Wi-Fi, make sure iOS is up to date enough for the phone’s normal eSIM controls, and keep the order details available on another screen or device. Treat the QR code and manual activation information like credentials: do not post or forward them publicly.
Decide when to install by reading the exact product’s activation rule. Installing a profile and starting its validity are not always the same event, but plans do not all use the same trigger. Do not activate early merely to test data unless the supplied instructions confirm that doing so will not reduce the useful travel period.
Add the Canada eSIM on iPhone
Open Settings > Cellular or Mobile Service and select Add eSIM. Choose the QR-code option when the purchase supplies a QR code, then scan it from another screen or printed copy. If manual details are provided, use the option to enter them exactly.
Follow the iPhone prompts until the new plan appears in the list of SIMs. Give it a clear label such as “Canada” or “Travel.” A useful label matters later because the Data Roaming controls for the primary and travel lines can look similar.
If the QR code reports that it has already been used, first check whether the eSIM is already present under Cellular or Mobile Service. Do not delete an installed profile and scan again without support guidance. The Canada eSIM installation guide covers the installation stage separately.
Select the Canada eSIM for Cellular Data
After the line has installed, open Settings > Cellular or Mobile Service > Cellular Data and select the Canada eSIM when you are ready to use it. This selection determines which line carries internet traffic.
Turn off Allow Cellular Data Switching. If it remains on, iPhone may move data to the primary line under some conditions, potentially triggering home-carrier roaming. Selecting the eSIM for data does not by itself prevent every possible charge on the other line.
Keep the default voice line on the number you intend to use. The NoveSIM travel eSIM is data-only and should not be selected with the expectation that it provides Canadian cellular calls or SMS.
Enable Data Roaming on the Correct Line
Open the Canada eSIM in the list of SIMs and enable Data Roaming when the purchased plan’s instructions require it. Travel eSIMs commonly use roaming to reach a supported local partner network.
Then open the primary line separately and check its Data Roaming setting. Leave it off unless you have verified and accepted your home carrier’s Canada terms. The two roaming switches apply to different lines; changing one does not automatically change the other.
Recommended iPhone Dual-SIM Settings
| iPhone setting | Recommended starting point | Purpose |
|---|---|---|
| Turn On This Line — Canada eSIM | On when ready to activate | Allows the installed travel line to register |
| Cellular Data | Canada eSIM | Routes app and browser data through the travel plan |
| Allow Cellular Data Switching | Off | Reduces the risk of data moving to the primary SIM |
| Data Roaming — Canada eSIM | Follow the product instructions; commonly On | Permits access to the supported partner network where required |
| Data Roaming — primary line | Off unless intentionally using home roaming | Helps prevent unintended primary-line data charges |
| Network Selection | Automatic initially | Lets iPhone search for an available supported network |
Keep Your Usual Number Available
Many iPhones can keep the primary SIM active while the eSIM supplies mobile data. This may allow access to the usual number for calls or verification texts, subject to the home carrier’s service and roaming terms.
Calls and SMS on the primary line do not become free because the Canada eSIM is selected for data. Check incoming and outgoing charges before leaving the line enabled. The Canada roaming guide explains the billing controls to review.
Internet apps such as messaging and calling services can use the Canada eSIM’s data. Their behaviour still depends on the app account, data availability and any number-verification requirements.
When Should the eSIM Connect?
The line may remain installed without connecting while the iPhone is outside Canada or another destination supported by the purchased plan. After arrival, turn the travel line on, select it for Cellular Data and apply the required roaming setting. Allow time for network registration, then test with a fresh webpage.
If validity begins on first supported-network connection, an unavailable signal before travel is not evidence of a failed installation. Confirm the product-specific activation rule rather than repeatedly changing settings.
The Canada eSIM activation guide provides the post-installation sequence without repeating the QR-code process.
Use Personal Hotspot Carefully
If the selected plan and iPhone support tethering, Personal Hotspot can share the Canada connection with a laptop or another device. Confirm the current plan terms before relying on it for work or group travel.
Hotspot use can consume data quickly and increase battery drain. Use a strong hotspot password, keep the iPhone powered during sustained use and disable large cloud backups or software updates over mobile data.
If the Canada eSIM Does Not Work on iPhone
Check the visible configuration in this order:
- The Canada eSIM appears under Cellular or Mobile Service.
- Turn On This Line is enabled.
- The Canada eSIM is selected under Cellular Data.
- Allow Cellular Data Switching is off.
- Data Roaming on the travel line matches the plan instructions.
- The iPhone is in a supported country and coverage area.
- Network Selection is Automatic unless support has supplied a manual choice.
Toggle Airplane Mode once or restart the iPhone after confirming the settings. If an APN is required, use only the value supplied for the purchased product; do not copy one from an unrelated provider. Continue with the Canada eSIM troubleshooting guide if the profile is present but data still does not load.
Do not delete the eSIM as the first troubleshooting step. Removal may prevent reuse of the original QR code and can turn a connection-settings problem into an installation problem.
Canada Coverage Still Depends on Location
Correct iPhone settings do not guarantee service in every part of Canada. Coverage can change between cities, highways, mountain areas, parks and remote communities. Check the plan’s supported-network information and the intended route, then retain maps and essential travel details offline.
Compare the current package details on the Canada eSIM page. A larger allowance can extend usage where service exists, but it cannot fill a local coverage gap.
Related Canada Setup Guides
- Check eSIM-compatible devices
- Install a Canada eSIM profile
- Activate a Canada eSIM after installation
- Troubleshoot a Canada eSIM connection
- Review Canada roaming charges
FAQ
How do I know whether my iPhone supports a Canada eSIM?
Check Settings > General > About for an EID, look for Add eSIM under Cellular or Mobile Service and confirm the exact device on the compatible-device list. Regional device configurations can differ.
Does my iPhone need to be unlocked?
Yes. In Settings > General > About, Carrier Lock should show “No SIM restrictions.” Only the carrier that applied a lock can remove it.
Can I keep my regular number while using the Canada eSIM?
Many dual-SIM iPhones allow the primary line to remain enabled while the Canada eSIM supplies data. Calls and SMS on the primary line remain subject to the home carrier’s availability and roaming charges.
Should Data Roaming be on for the Canada eSIM?
Follow the purchased plan’s instructions. Many travel eSIMs require Data Roaming on for the travel line to use a supported partner network. This is separate from the primary SIM’s roaming control.
Final Recommendation
Before purchasing a Canada eSIM for iPhone, verify the exact device’s eSIM capability and confirm that Carrier Lock shows no restrictions. Install the profile on dependable Wi-Fi and label it clearly.
After arrival, choose the Canada eSIM under Cellular Data, turn off Allow Cellular Data Switching and apply the travel line’s required roaming setting. Keep the primary line’s roaming off unless you knowingly want to use your home carrier, and do not delete the eSIM during initial troubleshooting.