


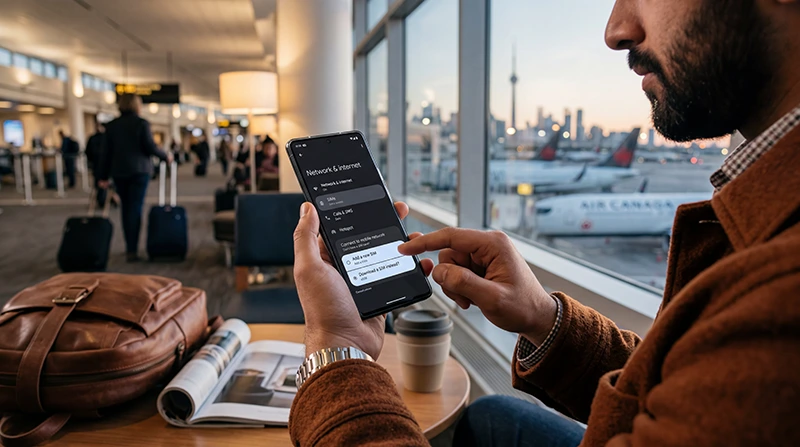

Setting up a Canada eSIM on Android starts with the exact phone, not the Android version alone. Samsung, Google Pixel and other manufacturers organise SIM controls differently, and some regional versions of an otherwise familiar model may not include eSIM support.
The phone must support eSIM and be carrier-unlocked. After installation, the Canada eSIM must be enabled and selected as the preferred line for mobile data. Menu names in this guide are examples; use the closest equivalent on your device and follow the instructions supplied with the purchased plan.
NoveSIM travel eSIMs are data-only. We do not provide a Canadian phone number or conventional cellular calls and SMS with these plans. A compatible dual-SIM Android phone can often keep the primary line available for its number while the Canada eSIM carries data.
Quick answer: Confirm that your exact Android model and regional variant support eSIM, then verify that the phone is unlocked. Add the Canada plan on stable Wi-Fi, label it clearly and choose it as the preferred SIM for Mobile Data after arrival. Disable automatic data switching and enable roaming on the travel eSIM when required, while leaving roaming off on the primary line unless you deliberately want home-carrier service.
Top Canada eSIMs

Canada eSIM
Fixed
1 GB, 7 days€ 3.992 GB, 15 days€ 6.663 GB, 30 days€ 9.76Unlimited
Unlimited, 1 day€ 5.32Unlimited, 3 days€ 15.09Unlimited, 5 days€ 23.52
Check the Exact Android Model for eSIM Support
A model family name is not enough because specifications can differ by country, carrier and hardware variant. Open Settings > About phone and record the full model number. Compare that exact device with the NoveSIM compatible-device list and the manufacturer’s documentation for its original market.
Look in the phone’s SIM settings for an option such as Add eSIM, Add mobile plan, Download a SIM or Add carrier. Its location varies:
- Samsung devices commonly place it under Settings > Connections > SIM manager.
- Google Pixel devices commonly use Settings > Network & internet > SIMs.
- Other manufacturers may use Mobile network, SIM cards or a similarly named section.
If the option is missing, confirm the exact variant before purchasing. A system update may expose a supported feature, but it cannot add eSIM hardware to a device that does not include it.
Confirm That the Phone Is Carrier-Unlocked
An Android phone can support eSIM and still reject a travel plan because it is locked to another carrier. Android does not provide one universal lock-status label across every manufacturer, so check the original carrier’s account or support information for the specific device.
If the phone is locked, only the carrier responsible for the restriction can normally remove it. NoveSIM cannot unlock the handset, and another QR code will not bypass the restriction. Resolve this before departure.
Prepare before Adding the Canada eSIM
Connect to dependable private Wi-Fi, charge the phone and keep the purchase details available on another screen or device. Protect the QR code and manual activation information as credentials; do not post them in a public message or screenshot.
Read the plan’s activation rule before proceeding. Installing an eSIM profile and starting the purchased validity period may be separate events, but products do not all use the same trigger. Do not turn the line on early merely to test it unless the supplied instructions confirm that this is appropriate.
Add the Canada eSIM on Samsung
On many recent Samsung devices, open Settings > Connections > SIM manager, then choose Add eSIM. Select the QR-code option and scan the code from another screen, or use the manual method if your purchase provides activation details.
Follow the prompts until the new plan appears in SIM manager. Give it a clear label such as “Canada” or “Travel.” If the phone shows that the code has already been used, check whether the eSIM is already installed before trying again.
Samsung’s wording and path can change between One UI versions and device variants. If these labels are not present, use Settings search for “eSIM” or “SIM manager” rather than selecting unrelated reset controls.
Add the Canada eSIM on Google Pixel
On many Pixel devices, open Settings > Network & internet > SIMs and choose Add SIM or Add eSIM. Select the option to set up an eSIM, scan the supplied QR code and complete the on-screen process.
Once the plan appears under SIMs, label it clearly. The exact labels may differ by Android release. If the eSIM has already been added, do not delete it simply because it is not yet connecting outside Canada.
The Canada eSIM installation guide covers the general QR-code and manual-entry stage. This page continues with Android-specific line controls.
Select the Canada eSIM for Mobile Data
After installation, open the phone’s SIM manager or SIMs screen and switch on the Canada eSIM when you are ready to use it. Under Preferred SIMs, Primary SIM or Mobile Data, select the Canada line.
Turn off automatic data switching, backup data or a similarly named option that can move internet traffic to another SIM. The wording varies by manufacturer. This setting matters because the phone could otherwise use the primary line when the travel eSIM briefly loses service.
If separate defaults are available for calls, messages and mobile data, only the data selection should point to the NoveSIM plan. Keep calls and SMS assigned to the line you intend to use, remembering that activity on the home line may incur roaming charges.
Enable Roaming on the Travel eSIM Only
Open the Canada eSIM’s individual settings and enable roaming when the purchased plan requires it. Travel eSIMs commonly use a roaming relationship to connect through a supported local partner.
Then inspect the primary SIM separately. Leave its data roaming off unless you have checked and accepted your home carrier’s Canada terms. On dual-SIM Android phones, it is easy to change the roaming control for the wrong line, so confirm the eSIM label before using the switch.
Recommended Android Dual-SIM Setup
| Android setting | Recommended starting point | Purpose |
|---|---|---|
| Canada eSIM | On when ready to activate | Allows the installed line to register |
| Preferred SIM for Mobile Data | Canada eSIM | Routes browser and app traffic through the travel plan |
| Automatic or backup data switching | Off | Reduces the risk of data moving to the primary SIM |
| Roaming — Canada eSIM | Follow the product instructions; commonly On | Permits partner-network access where required |
| Roaming — primary SIM | Off unless intentionally using home roaming | Helps prevent unintended primary-line data use |
| Network selection | Automatic initially | Lets the device search for an available supported network |
Configure an APN Only When Required
Many Android phones receive the APN automatically. Do not create a manual APN simply because the menu exists. If the plan instructions specify one, open the Canada eSIM’s Access Point Names section and enter the supplied value exactly.
Leave fields not mentioned in the instructions unchanged. Save the new APN, select it if the phone shows a list and restart the mobile-data connection. Never copy an APN from an unrelated carrier or a different eSIM product.
Use the Canada eSIM APN guide when the line is enabled but the configuration still needs attention.
Keep Your Regular SIM and Number
A dual-SIM Android device can often keep the physical SIM or another eSIM active while the Canada plan handles data. This can preserve access to your usual number for incoming calls or verification texts, subject to the home carrier’s service and charges.
Select the Canada eSIM as the only mobile-data line and disable automatic switching. Keeping the primary line active does not make its calls or messages free. Review the Canada roaming guide before relying on the home number abroad.
When Should the Android Phone Connect?
An installed Canada eSIM may remain without service while the phone is outside a country included in the plan. After arrival, turn the eSIM on, assign mobile data to it and apply the plan’s roaming instructions. Allow time for network registration, then load a new webpage to test actual data.
If the package starts on first supported-network connection, an unavailable connection before travel is not necessarily an installation problem. Confirm the product-specific activation rule before changing settings repeatedly.
For the post-installation sequence, see how to activate a Canada eSIM.
Hotspot Use on Android
If the device and purchased plan support tethering, open Hotspot & tethering, Mobile Hotspot or the equivalent manufacturer menu. Protect the hotspot with a strong password and confirm that the connected laptop or tablet can load data through the Canada eSIM.
Hotspot activity can increase data use, heat and battery drain. Keep the phone powered during sustained work and disable cloud backup, software updates and large downloads over mobile data when they are not needed.
If the Canada eSIM Does Not Work on Android
Check the configuration in a controlled order:
- The Canada eSIM appears in SIM manager, SIMs or Mobile network.
- The eSIM line is switched on.
- It is selected as the preferred SIM for Mobile Data.
- Automatic or backup data switching is off.
- Roaming on the travel line matches the purchased plan’s instructions.
- The phone is in a supported country and coverage area.
- Network selection is Automatic unless support has supplied another instruction.
- Any required APN matches the details for the exact product.
Toggle Airplane Mode once or restart the device after checking the settings. If the eSIM registers but mobile internet still fails, follow the Canada eSIM troubleshooting guide.
Do not delete the installed eSIM as an initial troubleshooting step. The QR code may not support a second installation, and removal can make recovery more difficult.
Coverage Depends on the Canadian Location
Correct Android settings cannot create service where the supported network has no coverage. Signal can vary between cities, buildings, highways, mountain regions, parks and remote communities. Check coverage for the actual itinerary and keep essential navigation offline.
Review the exact package’s current allowance, validity and supported-network information on the Canada eSIM page. A large allowance is useful only where the plan can connect.
Related Canada Setup Guides
- Check eSIM-compatible devices
- Install a Canada eSIM
- Activate the installed Canada eSIM
- Configure a Canada eSIM APN when required
- Troubleshoot a Canada eSIM connection
FAQ
How do I know whether my Android phone supports a Canada eSIM?
Record the full model number under About phone, compare the exact regional variant with the compatible-device list and look for Add eSIM, Download a SIM or a similar control in the SIM settings.
Does an eSIM-compatible Android phone need to be unlocked?
Yes. A carrier lock can prevent another provider’s eSIM from being added or used. Confirm the lock status with the carrier responsible for the device before purchasing.
Why do the menu names in this guide differ from my phone?
Android manufacturers and software versions organise mobile-network controls differently. Use Settings search for eSIM, SIM manager, Mobile Data or roaming, and confirm that every change applies to the Canada travel line.
Do I need to enter an APN manually?
Only when the purchased plan’s instructions require it or support provides the exact value. Many devices configure the APN automatically, so do not copy settings from an unrelated provider.
Final Recommendation
Before purchasing a Canada eSIM for Android, verify the full model number, regional eSIM support and carrier-unlocked status. Install the plan on reliable Wi-Fi and label it clearly so that its controls cannot be confused with the primary SIM.
After arrival, enable the Canada line, select it for Mobile Data, disable automatic switching and follow the plan’s roaming or APN instructions. Keep roaming off on the primary SIM unless you knowingly choose home-carrier service, and do not remove the eSIM during initial troubleshooting.