


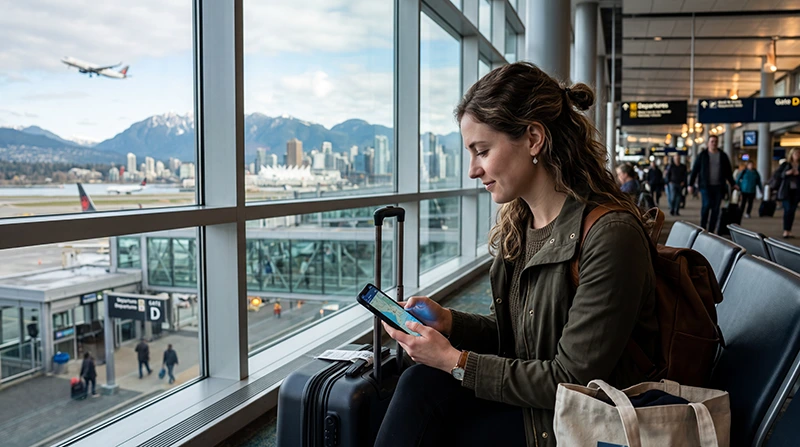

At Vancouver International Airport (YVR), the connection you need depends on the next step after landing. Free terminal Wi-Fi can get an arrival message out and put your route on the phone. It cannot be assumed to keep a map or booking open after you move toward the Canada Line, a pickup point or an onward journey.
Separate the first ten minutes from the rest of your trip. If the only immediate task is confirming an address, Wi-Fi and an offline copy may be sufficient. If you need live directions and contact with someone on the way, arrange mobile data or check your home carrier’s Canadian roaming terms before you leave the terminal.
NoveSIM Canada travel eSIMs provide data on compatible unlocked phones, not a Canadian number, conventional voice calls or carrier SMS. Internet calling and messaging apps can use that data. A home SIM left active for ordinary calls or texts remains subject to its carrier’s charges.
Quick answer: Use YVR’s free terminal Wi-Fi for an arrival message and to save your first route. For internet beyond the terminal, use a prepared Canada eSIM on an eligible phone, a suitable home-carrier roaming plan, or a physical SIM if you need a Canadian number. Before heading to the train or pickup area, turn Wi-Fi off and test the mobile-data line you will actually rely on.
Top Canada eSIMs


Which Task Has to Work Before You Leave YVR?
If you just need to send “I’ve landed” or find the hotel address, start with the free Wi-Fi identified on YVR’s terminal map. Verify the current network name on airport signage. If sign-in fails, follow the YVR Wi-Fi connection checks while you are still in the terminal. Then decide whether a saved route is enough or you need mobile data for the onward journey.
For a pickup, save the agreed meeting location and vehicle details before walking away. For transit, save your first station and destination even if you expect a live map. If the next task depends on a fresh app notification, a changed platform or a call through an internet app, make sure cellular data works rather than assuming the Wi-Fi symbol will follow you outside.
Choose Mobile Data or a Physical SIM for What Comes Next
A Canada travel eSIM can avoid looking for an airport counter if your device is unlocked and eSIM-compatible. Check the exact phone model, the selected plan’s validity and its installation instructions before departure. Prepare the profile in advance when the plan permits, but do not assume that installation and the start of validity mean the same thing for every product.
A physical Canadian SIM is worth considering when a local number, ordinary calls or staff-assisted setup are part of your requirement. YVR lists an on-airport SIM retail option, but counter access, hours, stock and plan terms can change; see the airport SIM-card guide for the current purchase checks. If your home carrier already includes Canada, compare its data allowance and billing triggers before paying for another line.
The Canada Line Is the First Test Beyond the Terminal
TransLink lists the Canada Line between YVR–Airport Station and Waterfront in Downtown Vancouver. It also links to routes for other destinations. Waterfront may be a hub rather than the stop closest to your accommodation, so save the precise address and any onward transfer. Airport Wi-Fi is for preparation; a mobile connection or an offline route supports the trip after you leave it.
Check current TransLink fares before you travel. Its YVR AddFare rules explain that some journeys starting at the airport incur an additional charge and that certain products or journeys are exempt. Do not mistake a fare charge for a mobile-data cost, or assume that buying internet also buys a train ticket. Keep a supported payment method and the first route ready.
Test the Connection You Purchased, Not Just the Airport Wi-Fi
- While you are safely inside the terminal, save your accommodation address, booking confirmation and first train or pickup instructions so they open without another login.
- If using an eSIM, follow that plan’s installation and activation instructions. Select the intended travel line for mobile data and apply its required Data Roaming setting. Control home-line roaming and automatic data switching if you do not want your carrier to supply data.
- Switch Wi-Fi off temporarily. Load an ordinary web page and a map with cellular data. If you bought a physical SIM, ask the seller to demonstrate the purchased service before leaving the counter.
- If the test fails, use the saved route and return to a safe place to troubleshoot. Do not delete an installed eSIM solely because data has not connected; check the selected line and plan instructions first.
- After the first journey, compare the plan’s usable network and allowance with your wider itinerary. If you will move between Vancouver neighbourhoods, use the Vancouver city internet guide to plan where mobile data or #VanWiFi will support those journeys.
Do Not Judge a Canada Plan by Signal at the Airport
A cellular test at YVR confirms that the intended line can pass data there. It does not establish reception on every road, ferry connection or destination in British Columbia. Check the chosen product’s supported networks and your planned route. Hotspot and 5G availability depend on the plan, phone, partner network and local coverage; there is no reason to promise either from a successful airport test.
If Vancouver is the start of a longer Canada trip, use the Canada tourist connectivity guide to compare the options for additional stops. Keep the route and contact information for your first night offline regardless of your eventual data allowance.
Related Articles
- Connect to free Wi-Fi at YVR
- Check the SIM purchase option at YVR
- Compare current Canada travel eSIM plans
- Plan internet around Vancouver after arrival
FAQ
Is free internet available when I land at Vancouver Airport?
YVR identifies free Wi-Fi on its terminal map. Confirm the current network on airport signage and use it for an arrival message or route download. Do not count on terminal Wi-Fi for your journey after leaving the airport.
What should I arrange if I need internet on the Canada Line?
Check your home carrier’s Canada roaming terms or prepare mobile data through a compatible Canada travel eSIM or suitable physical SIM. Save the route offline and test the chosen cellular line with Wi-Fi off before boarding.
Can I buy a physical SIM at YVR instead of using an eSIM?
YVR lists an airport retail option for SIM cards. Check the current counter location, access, hours and available plans; ask whether the offer includes a Canadian number and have the seller test it. A NoveSIM travel eSIM is data-only.
Does a working YVR Wi-Fi connection mean my eSIM is working?
No. Wi-Fi and the cellular line are separate connections. Turn Wi-Fi off and load a normal page using the intended eSIM or SIM; check line selection and plan instructions if the test fails.
Final Recommendation
At YVR, let free terminal Wi-Fi handle the immediate message and download, then match a mobile option to the tasks that continue after you leave. A data-only eSIM is convenient on an eligible phone; a physical SIM is more relevant if you need a Canadian number.
Save your first address and transfer, check the current YVR-to-city route and test cellular data with Wi-Fi off before heading away from a safe connection point. Keep a separate transit-payment method ready.
The successful arrival is not simply seeing a Wi-Fi icon in the terminal. It is having the directions and contact details you need when you are on the train, at a pickup point or moving on to the next destination.