


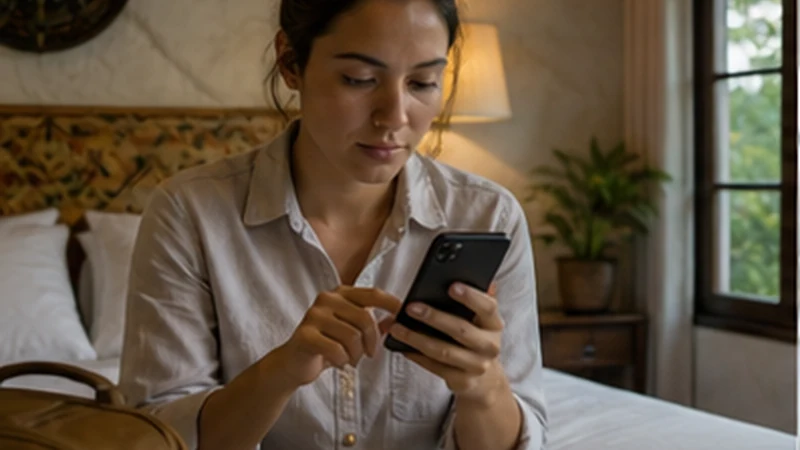

Install an eSIM for Guatemala by adding its digital profile securely to a compatible, unlocked phone. Complete the process before departure when the activation rules allow, while dependable private internet and time for device troubleshooting are available.
Installation is not proof that the plan is active or connected. Those later stages depend on the product’s activation rule, the phone’s settings and supported network coverage in Guatemala.
NoveSIM Guatemala plans are data-only. They provide internet access but not a Guatemalan telephone number, conventional calls or SMS.
Quick answer: Check the exact phone model and carrier-lock status, read the activation terms, connect to trusted Wi-Fi and add the eSIM using its private QR code or supplied manual details. Label the new line “Guatemala” and confirm it appears in settings. Do not scan it repeatedly or remove the profile after installation.
Top Guatemala eSIMs

Guatemala eSIM
Fixed
1 GB, 7 days6.50$2 GB, 15 days10.50$3 GB, 30 days13.50$Unlimited
Unlimited, 1 day6.00$Unlimited, 3 days20.00$Unlimited, 5 days28.00$
Central America eSIM
Fixed
1 GB, 7 days8.00$2 GB, 15 days13.00$3 GB, 30 days17.50$Unlimited
Unlimited, 1 day7.50$Unlimited, 3 days18.50$Unlimited, 5 days29.50$Before You Install an eSIM for Guatemala
A product name such as iPhone, Galaxy or Pixel is not precise enough to prove compatibility. eSIM support can vary by exact model, market of manufacture and carrier configuration. Check the model identifier in the device settings and compare it with reliable compatibility information.
The phone must also be carrier-unlocked. A device can support eSIM technically while remaining restricted to its original operator. Look for the lock status in settings where the platform exposes it, or confirm with the carrier that sold the phone.
Finally, make sure the device has room for another eSIM profile or active line. Some phones can store several profiles but operate only a limited number at once. Remove nothing until the existing lines and their roles are understood.
The Guatemala eSIM compatibility guide explains how phone capability, carrier lock and destination coverage answer different parts of the question.
Read the Activation Rule Before Installing
Review the current order instructions to find what event begins validity. Installation may be allowed in advance, but it should not be assumed that every plan starts in the same way.
If validity starts through a particular action or connection event, plan the installation and line activation around the actual travel dates. When the wording is unclear, contact support before adding or switching on the profile.
The separate Guatemala eSIM activation guide explains the distinction between installing the profile, starting the service, registering on a network and passing mobile data.
Prepare a Secure Installation Session
Use stable private Wi-Fi and keep the phone connected to power or ensure that it has sufficient battery. Avoid beginning the process during boarding, in a moving vehicle or on an unfamiliar public network.
Open the installation email or order page on a second trusted screen when possible so the phone camera can scan the QR code. If only one device is available, use the platform’s supported method for opening a QR image or enter the supplied activation details manually.
Treat the QR code like a credential. Do not share it in a public support post, upload it to a shared photo album or include it in an unprotected screenshot.
Install the Guatemala eSIM on iPhone
Exact menu wording can change with iOS versions, but the normal route is:
- Open Settings and Cellular or Mobile Service.
- Select Add eSIM.
- Choose the QR-code option and scan the private code once.
- If scanning is unavailable, use Enter Details Manually and copy the supplied information exactly.
- Follow the system prompts until the new cellular plan is added.
- Label the line “Guatemala” or another unmistakable travel name.
Do not assume that the line must immediately show a Guatemalan network while the phone is still abroad. A visible profile in Settings is the installation check. Use the Guatemala eSIM guide for iPhone for the later dual-line and arrival settings.
Install the Guatemala eSIM on Android
Manufacturers organise eSIM controls differently. Look under SIM Manager, Connections, Network & Internet, SIMs or Mobile Network.
- Choose Add eSIM, Download SIM or Add Mobile Plan.
- Scan the QR code once or select the manual-entry method.
- Wait while the profile downloads; do not close Settings during the process.
- Confirm that the new eSIM appears in the device’s SIM list.
- Give it a clear Guatemala or Travel label.
Do not confuse a manufacturer’s transfer-SIM feature with adding a new travel eSIM. The Guatemala Android eSIM guide covers common menu names and the settings needed after arrival.
How to Confirm Successful Installation
The eSIM should appear as a separate line inside the phone’s cellular or SIM settings. Its label, on/off control and line details should be visible. That is stronger evidence than a final QR-screen message that may have closed too quickly.
Record which line is the home SIM and which is Guatemala. Keep the home line selected for normal pre-travel use unless the activation instructions say otherwise. If advance activation is not intended, leave the travel line in the state specified by the product instructions.
Store the order number and non-secret support instructions somewhere accessible offline. Keep the activation credential private rather than distributing extra copies.
If the QR Code Will Not Scan
Clean the camera lens, increase brightness on the second screen and display the entire code without cropping. Make sure the device is using the Add eSIM scanner rather than an ordinary camera app.
If scanning still fails, use the manual installation details supplied with the order. Copy the address and activation code exactly, avoiding added spaces. Do not substitute values from another order or country.
A message that the code has already been used can mean the profile is already installed or that the credential needs investigation. Check the SIM list before trying again, then contact NoveSIM Support with the order number and exact error message.
What to Do After the Profile Is Installed
Do not run arrival configuration prematurely unless the plan instructions require it. In Guatemala, switch on the travel line, select it for mobile data, enable Data Roaming on it, disable home-line roaming and turn automatic data switching off.
Keep network selection on Automatic and allow time for registration. If the phone registers but mobile data does not load, enter data.esim only when manual APN configuration is required.
Do not delete the installed eSIM because it shows No Service before arrival or during an initial registration delay. Some activation codes cannot be reused, so removal can convert a settings question into an installation problem.
Related Articles
FAQ
Can I install a Guatemala eSIM before travelling?
Usually this is the easiest approach when the product terms allow advance installation. Read the activation rule first so installation or switching the line on does not start validity earlier than intended.
How do I know the eSIM was installed?
Open the phone’s cellular or SIM settings and confirm that a separate Guatemala or travel line appears. It does not need to register on a Guatemalan network while the phone is still outside the destination.
Can I scan the same QR code on two phones?
Do not assume so. An eSIM activation credential commonly belongs to one installation and may be single-use. Install it only on the device intended for the trip.
Should I delete an installed eSIM that shows No Service?
No. Confirm location, activation status and arrival settings first. A profile can be installed correctly before a supported Guatemala network is available.
Final Recommendation
Install an eSIM for Guatemala before departure over trusted Wi-Fi after confirming the exact phone model, carrier-unlock status and activation rule.
Scan the private credential once, label the profile clearly and verify its presence in the cellular settings instead of expecting immediate destination service.
Keep the installed profile, protect the QR code and complete data-line, roaming and registration settings only at the appropriate activation stage.