


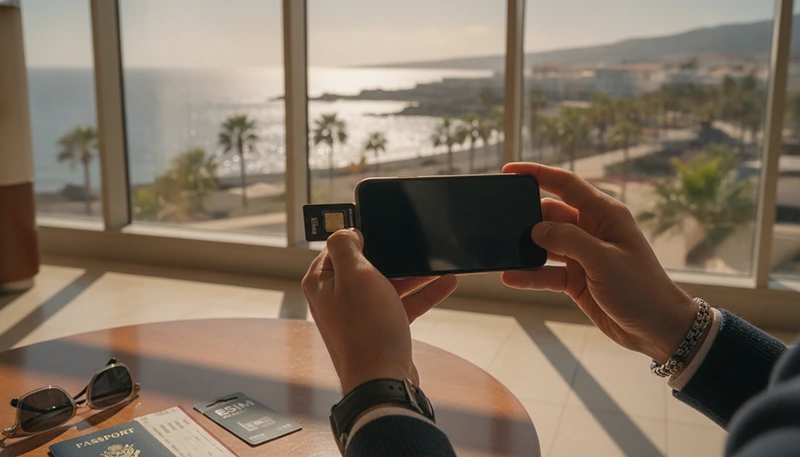

Installing a Canary Islands eSIM before departure is one of the easiest ways to prepare mobile internet for your trip. The eSIM profile is downloaded digitally to your phone, so you do not need to remove your physical SIM card or visit a mobile shop after arrival.
The installation process normally takes only a few minutes when your phone is compatible, unlocked and connected to stable WiFi. After installation, you can keep the travel line turned off until you arrive, depending on the activation conditions of the selected plan.
Installation is different from activation. Installing the eSIM adds the digital profile to your device, while activation usually happens when the line is enabled and connects to a supported network in Tenerife, Gran Canaria, Lanzarote, Fuerteventura or another included island.
Quick answer: Connect your phone to stable WiFi, open the SIM settings, select Add eSIM and scan the supplied QR code. Label the new line as NoveSIM or Travel and keep it installed. After arrival, select it for mobile data, enable Data Roaming and use data.esim as the APN if manual configuration is required.
Top Canary Islands eSIMs

Canary Islands eSIM
Fixed
1 GB, 7 days2.00$2 GB, 15 days4.00$3 GB, 30 days5.00$Unlimited
Unlimited, 1 day2.50$Unlimited, 3 days5.50$Unlimited, 5 days9.00$
Europe Extra eSIM
Fixed
1 GB, 7 days2.50$2 GB, 15 days4.00$3 GB, 30 days5.00$Unlimited
Unlimited, 1 day3.00$Unlimited, 3 days6.00$Unlimited, 5 days10.00$Europe+ eSIM
Fixed
1 GB, 7 days3.00$2 GB, 15 days4.50$3 GB, 30 days6.00$Unlimited
Unlimited, 1 day3.00$Unlimited, 3 days7.00$Unlimited, 5 days11.50$Europe Lite eSIM
Fixed
1 GB, 7 days2.50$2 GB, 15 days4.00$3 GB, 30 days5.00$Unlimited
Unlimited, 1 day3.00$Unlimited, 3 days6.00$Unlimited, 5 days10.00$What You Need Before Installing the eSIM
Prepare everything before beginning the installation. An incomplete setup or unstable WiFi connection may prevent the phone from downloading the eSIM profile correctly.
- An eSIM-compatible smartphone.
- An unlocked device.
- A stable private WiFi connection.
- The supplied QR code.
- Manual installation details when provided.
- Enough battery power.
- Access to the order email or customer account.
- The plan activation instructions.
Install the eSIM while you still have reliable internet and access to the purchase details.
Check Whether Your Phone Supports eSIM
Not every smartphone can install an eSIM. Compatibility depends on the exact model, regional version and sometimes the mobile operator that originally sold the device.
To check on iPhone:
- Open Settings.
- Select Cellular or Mobile Service.
- Look for Add eSIM.
To check on Android:
- Open Settings.
- Search for eSIM, SIM Manager or Add SIM.
- Look for an option to add or download an eSIM.
You can also dial:
*#06#
If the phone displays an EID in addition to one or more IMEI numbers, it usually supports eSIM.
Check Whether the Phone Is Unlocked
A phone may support eSIM technology but still reject a travel profile when it is locked to one operator.
On iPhone:
- Open Settings.
- Select General.
- Select About.
- Find Carrier Lock.
If the status shows No SIM restrictions, the iPhone is generally unlocked.
On Android, the lock status is not always displayed clearly. Contact the original operator or test the device with a SIM from another network before travelling.
When Should You Install a Canary Islands eSIM?
The best time to install the eSIM depends on when the plan validity begins.
| Plan Activation Type | Recommended Installation Time |
|---|---|
| Starts on first destination network connection | Install before departure |
| Starts immediately after installation | Install shortly before travelling |
| Starts on a selected date | Install after confirming the date |
| Requires manual activation | Follow the plan instructions |
Read the product details before installation so you do not lose part of the plan validity unnecessarily.
How to Install a Canary Islands eSIM with a QR Code
QR code installation is the most common method.
- Connect the phone to stable WiFi.
- Open the eSIM purchase email or account page.
- Display the QR code on another device or print it.
- Open the mobile network or SIM settings.
- Select Add eSIM or a similar option.
- Choose QR code installation.
- Scan the supplied QR code.
- Confirm the eSIM download.
- Wait for the profile to appear in the SIM settings.
- Label the line as NoveSIM, Travel or Canary Islands.
Do not scan the QR code on a second device after installation. Most travel eSIM profiles are intended for one phone and one installation.
How to Install a Canary Islands eSIM on iPhone
- Connect the iPhone to stable WiFi.
- Open Settings.
- Select Cellular or Mobile Service.
- Select Add eSIM.
- Choose Use QR Code.
- Scan the eSIM QR code.
- Select Continue.
- Wait for the plan to be added.
- Choose a clear label for the new line.
- Keep the eSIM installed until the trip is complete.
The wording may differ slightly depending on the iOS version and regional settings.
Installing an eSIM Stored on the Same iPhone
If the QR code is saved as an image on the same iPhone, newer iOS versions may allow installation directly from Photos, Mail or another supported screen.
Possible options include:
- Pressing and holding the QR code.
- Selecting Add eSIM when it appears.
- Opening the code from Photos during the Add eSIM process.
- Using manual installation details instead.
If the phone does not recognise the saved image, display the QR code on a laptop, tablet or another phone.
How to Install a Canary Islands eSIM on Samsung
- Connect the Samsung phone to stable WiFi.
- Open Settings.
- Select Connections.
- Select SIM Manager.
- Select Add eSIM.
- Select Scan QR Code.
- Scan the supplied code.
- Confirm the mobile plan download.
- Wait for the eSIM to appear.
- Give the line a clear label.
Menu names can vary slightly depending on the Galaxy model and software version.
How to Install a Canary Islands eSIM on Google Pixel
- Connect the Pixel phone to WiFi.
- Open Settings.
- Select Network & Internet.
- Select SIMs.
- Select Add SIM.
- Choose Set Up an eSIM or Download a SIM Instead.
- Scan the supplied QR code.
- Confirm the download.
- Wait for the profile to appear.
- Label the eSIM clearly.
How to Install an eSIM on Other Android Phones
Motorola, Xiaomi, Honor and other manufacturers may place the installation option under different menus.
Look under:
- Mobile Network.
- SIM Management.
- Network & Internet.
- Cellular Network.
- Connections.
Use the search bar inside Settings and search for eSIM when the option is difficult to find.
How to Install the eSIM Manually
If the QR code cannot be scanned and manual installation details are available, enter the information directly.
- Open the option to add an eSIM.
- Select manual setup or enter activation details.
- Enter the supplied SM-DP+ address.
- Enter the activation code.
- Enter a confirmation code only when provided.
- Confirm the download.
- Wait for installation to complete.
Enter every character exactly as supplied. Do not add spaces, quotation marks or punctuation.
QR Code Installation vs Manual Installation
| Method | Main Advantage | When to Use It |
|---|---|---|
| QR code | Fast and simple | Recommended for most travellers |
| Manual details | Works without scanning | When the QR code cannot be displayed separately |
| Direct device installation | May require fewer steps | When supported by the provider and phone |
How to Label the New eSIM
Give the travel profile a clear name so you do not confuse it with your primary SIM.
Useful labels include:
- NoveSIM.
- Travel.
- Canary Islands.
- Holiday Data.
- Spain Travel.
A clear label makes it easier to select the correct line for mobile data after landing.
What to Select During iPhone Installation
During installation, the iPhone may ask how each line should be used. You can adjust these settings later.
| Setup Question | Recommended Choice |
|---|---|
| Default Voice Line | Keep your primary SIM |
| iMessage and FaceTime | Keep your existing number |
| Cellular Data | Select the travel eSIM after arrival |
| Allow Cellular Data Switching | Disable |
The travel eSIM is data-only, so your primary number can remain selected for calls, SMS, iMessage and FaceTime.
What to Select During Android Installation
Android phones may ask whether the new eSIM should be used for calls, messages or mobile data.
The recommended configuration is:
- Primary SIM for calls.
- Primary SIM for SMS.
- Travel eSIM for mobile data after arrival.
- Automatic data switching disabled.
- Data Roaming enabled only on the travel eSIM.
Should You Enable the eSIM Immediately?
You can keep the installed profile turned off until arrival when the plan instructions allow it.
Enable it before departure only when:
- The provider specifically instructs you to do so.
- The plan does not begin until destination connection.
- You need to complete a required setup step.
Do not enable it early when the validity period starts immediately and your journey is still several days away.
How to Activate the Installed eSIM After Arrival
- Open the phone’s SIM settings.
- Enable the travel eSIM.
- Select it as the preferred line for mobile data.
- Enable Data Roaming on the travel eSIM.
- Disable automatic data switching.
- Keep roaming disabled on the primary SIM.
- Turn off WiFi to test mobile data.
- Wait a few minutes for network registration.
If the connection does not start, turn Airplane Mode on for approximately 30 seconds and then turn it off.
Recommended Settings After Installation
| Setting | Recommended Configuration |
|---|---|
| Travel eSIM | Enabled after arrival |
| Preferred mobile data line | NoveSIM or Travel |
| Data Roaming on travel eSIM | Enabled |
| Primary SIM Data Roaming | Disabled |
| Automatic Data Switching | Disabled |
| APN | data.esim |
How to Set the APN After Installation
The APN may configure automatically. If the phone has signal but no mobile internet, check it manually.
| APN Field | Value |
|---|---|
| Name | NoveSIM |
| APN | data.esim |
| Username | Leave blank |
| Password | Leave blank |
Leave all other settings unchanged unless different values are specifically supplied.
How to Check That Installation Was Successful
The installation is normally complete when:
- The new eSIM appears in the phone’s SIM settings.
- The line has the selected label.
- The phone does not show an installation error.
- You can open the travel line settings.
- The profile remains visible after restarting the phone.
The eSIM does not need to show a local network before you arrive in the destination.
Why the Installed eSIM May Show No Service Before Travel
No Service is normal when the eSIM is outside its covered destination or turned off.
The plan may only connect after:
- You arrive in the Canary Islands.
- The travel line is enabled.
- Data Roaming is turned on.
- The phone detects a supported partner network.
Do not delete the profile simply because it does not connect in your home country.
What to Do If the QR Code Does Not Scan
- Increase the brightness of the device displaying the code.
- Clean the camera lens.
- Move the camera closer or farther away.
- Display the full QR code without cropping.
- Avoid reflections and glare.
- Open the original image rather than a compressed screenshot.
- Try manual installation details if available.
Do not repeatedly scan the code on different phones because this may cause the installation to be linked to the wrong device.
What to Do If the QR Code Says It Is Invalid
An invalid or already used message may appear when:
- The eSIM has already been installed.
- The QR code was scanned on another device.
- The phone is carrier-locked.
- The device does not support eSIM.
- The installation details were entered incorrectly.
- The profile is no longer available for download.
Check the SIM settings first. The eSIM may already be installed even if you did not notice the final confirmation.
What to Do If Installation Stops or Fails
- Confirm that WiFi is working.
- Restart the phone.
- Return to the Add eSIM menu.
- Check whether the profile already appears.
- Confirm that the phone is unlocked.
- Disable any VPN temporarily.
- Try the installation again only if the QR code has not been used.
Do not delete a partially installed or visible profile without support guidance.
Can You Reinstall the eSIM After Deleting It?
Not always. Many travel eSIM QR codes can be used only once.
Deleting the eSIM may permanently remove the profile from the phone and prevent the original code from working again.
Do not delete the eSIM while troubleshooting unless support specifically instructs you to do so.
Can You Install the Same eSIM on Two Phones?
Usually not. Travel eSIM profiles are normally intended for one compatible device.
Once the QR code has been used successfully, it should not be scanned on another phone. A separate plan is generally needed for each device or traveller.
Can You Transfer the eSIM to Another Device?
Travel eSIM transfers are not always supported. Built-in phone transfer tools may work for selected domestic operator plans but not for temporary travel profiles.
Install the eSIM on the phone you intend to use during your Canary Islands trip. Contact support before resetting, replacing or changing the device.
Can You Keep Your Main SIM Installed?
Yes. Keeping your primary SIM active allows you to retain your usual number while the eSIM provides mobile data.
You may continue to:
- Receive SMS verification codes.
- Receive calls on your usual number.
- Use WhatsApp with the existing number.
- Use the travel eSIM for internet.
- Avoid removing the physical SIM card.
Your home operator may charge for calls and SMS while roaming. Keep mobile data roaming disabled on the primary SIM.
Will WhatsApp Change After Installation?
No. Installing an eSIM does not normally change the telephone number registered with WhatsApp.
Keep the existing WhatsApp number when prompted. Messages and internet calls will use mobile data from the travel eSIM after it is selected as the data line.
Can One Installed eSIM Work Across the Canary Islands?
Yes. When the selected plan includes the Canary Islands, the same installed profile can generally remain active while you travel between:
- Tenerife.
- Gran Canaria.
- Lanzarote.
- Fuerteventura.
- La Palma.
- La Gomera.
- El Hierro.
You do not normally need to install the eSIM again on each island.
Installation Checklist Before Departure
- Confirm that the phone supports eSIM.
- Dial *#06# and look for an EID.
- Confirm that the device is unlocked.
- Read the activation conditions.
- Connect to stable WiFi.
- Install the eSIM using the QR code.
- Label the new line clearly.
- Save the order and support details.
- Do not delete the installed profile.
- Download offline maps before travelling.
Setup Checklist After Arrival
- Enable the travel eSIM.
- Select it for mobile data.
- Enable Data Roaming on the eSIM.
- Disable automatic data switching.
- Keep primary SIM roaming disabled.
- Turn off WiFi to test the connection.
- Set the APN to data.esim if needed.
- Use Airplane Mode for 30 seconds if necessary.
- Restart the phone if it does not register.
- Test maps, WhatsApp and web browsing.
Related Articles
- How to Activate a Canary Islands eSIM
- Canary Islands eSIM for iPhone
- Canary Islands eSIM for Android
- Best eSIM for Canary Islands
- Canary Islands Travel Internet Guide
FAQ
How do I install a Canary Islands eSIM?
Connect to stable WiFi, open the phone’s SIM settings, select Add eSIM, scan the supplied QR code and follow the installation prompts.
Should I install the eSIM before travelling?
Yes. Installation before departure is recommended, but first check when the plan validity begins.
Do I need WiFi to install the eSIM?
Yes. The phone normally needs a stable internet connection to download the eSIM profile.
Can I install the eSIM from a QR code saved on the same phone?
Some newer phones allow direct installation from a saved image. Otherwise, display the QR code on another device or use manual details.
Why does the eSIM show No Service after installation?
This is normal before arrival. The eSIM may only connect after reaching a supported network in the Canary Islands.
Can I scan the same QR code on another phone?
Usually not. Most travel eSIM QR codes are intended for one installation on one device.
Can I delete and reinstall the eSIM?
Do not delete it unless support specifically advises you to do so. Some QR codes cannot be reused.
What APN should I use?
Use data.esim. Leave the username and password blank unless different details are supplied.
Can I keep my main SIM active?
Yes. You can normally keep your primary SIM active for calls and SMS while the travel eSIM provides mobile data.
Will WhatsApp keep my original number?
Yes. WhatsApp normally remains linked to the existing registered number while using mobile data from the eSIM.
Final Recommendation
Install your Canary Islands eSIM before departure while connected to stable WiFi. Scan the supplied QR code, label the line clearly and keep the profile stored on your phone until the trip is complete.
After arrival, enable the eSIM, select it for mobile data, turn on Data Roaming and disable automatic data switching. Use data.esim as the APN when manual configuration is required, and never delete the eSIM during troubleshooting unless support specifically advises you to do so.